Schedule > Tutorial 4. For Loops Activity
 In this tutorial, you are going to design a customizable function that creates an image of any pixel art that can be represented as rows and columns of integers. The data structure that we will use to store these rows and columns of integers will be a “tuple of tuples” (see below). The purpose of this exercise is to help you feel a little bit more comfortable with tuples (and sequences in general), iteration, and functions. In addition to pixel art, many different kinds of entities can also be expressed using similar data formats (JPEG images, songs, DNA sequences, whatever).
Introduction: New Data Representations
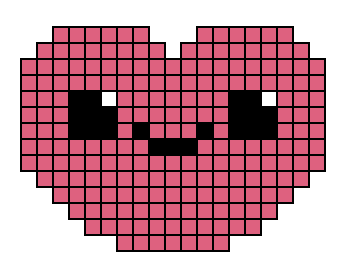
Below are two examples of two “tuple of tuples” that represent pixel art specifications. Note that “Frank” is made up of 11 rows and 9 columns, and the heart is 14 rows and 19 columns. Each number in the tuple represents a distinct color. 0 indicates that no color should be used (an empty pixel), but you get to pick which colors to use to represent 1, 2, and 3.
# Frank
frank = (
    (0, 0, 1, 1, 1, 1, 1, 0, 0),
    (0, 0, 2, 2, 2, 2, 2, 0, 0),
    (0, 0, 2, 2, 2, 2, 2, 0, 0),
    (0, 0, 2, 1, 2, 1, 2, 0, 0),
    (0, 0, 2, 2, 2, 2, 2, 0, 0),
    (0, 2, 3, 3, 3, 3, 3, 2, 0),
    (0, 2, 2, 2, 2, 2, 2, 2, 0),
    (0, 2, 2, 2, 2, 2, 2, 2, 0),
    (0, 0, 1, 1, 1, 1, 1, 0, 0),
    (0, 0, 1, 1, 1, 1, 1, 0, 0),
    (0, 0, 2, 2, 0, 2, 2, 0, 0)
)

# Heart w/smiley face
heart = (
    (0, 0, 1, 1, 1, 1, 1, 1, 0, 0, 0, 1, 1, 1, 1, 1, 1, 0, 0),
    (0, 1, 1, 1, 1, 1, 1, 1, 1, 0, 1, 1, 1, 1, 1, 1, 1, 1, 0),
    (1, 1, 1, 1, 1, 1, 1, 1, 1, 1, 1, 1, 1, 1, 1, 1, 1, 1, 1),
    (1, 1, 1, 1, 1, 1, 1, 1, 1, 1, 1, 1, 1, 1, 1, 1, 1, 1, 1),
    (1, 1, 1, 2, 2, 3, 1, 1, 1, 1, 1, 1, 1, 2, 2, 3, 1, 1, 1),
    (1, 1, 1, 2, 2, 2, 1, 1, 1, 1, 1, 1, 1, 2, 2, 2, 1, 1, 1),
    (1, 1, 1, 2, 2, 2, 1, 2, 1, 1, 1, 2, 1, 2, 2, 2, 1, 1, 1),
    (1, 1, 1, 1, 1, 1, 1, 1, 2, 2, 2, 1, 1, 1, 1, 1, 1, 1, 1),
    (1, 1, 1, 1, 1, 1, 1, 1, 1, 1, 1, 1, 1, 1, 1, 1, 1, 1, 1),
    (0, 1, 1, 1, 1, 1, 1, 1, 1, 1, 1, 1, 1, 1, 1, 1, 1, 1, 0),
    (0, 0, 1, 1, 1, 1, 1, 1, 1, 1, 1, 1, 1, 1, 1, 1, 1, 0, 0),
    (0, 0, 0, 1, 1, 1, 1, 1, 1, 1, 1, 1, 1, 1, 1, 1, 0, 0, 0),
    (0, 0, 0, 0, 1, 1, 1, 1, 1, 1, 1, 1, 1, 1, 1, 0, 0, 0, 0),
    (0, 0, 0, 0, 0, 0, 1, 1, 1, 1, 1, 1, 1, 0, 0, 0, 0, 0, 0)
)
Step 1: Update the “draw_row” function
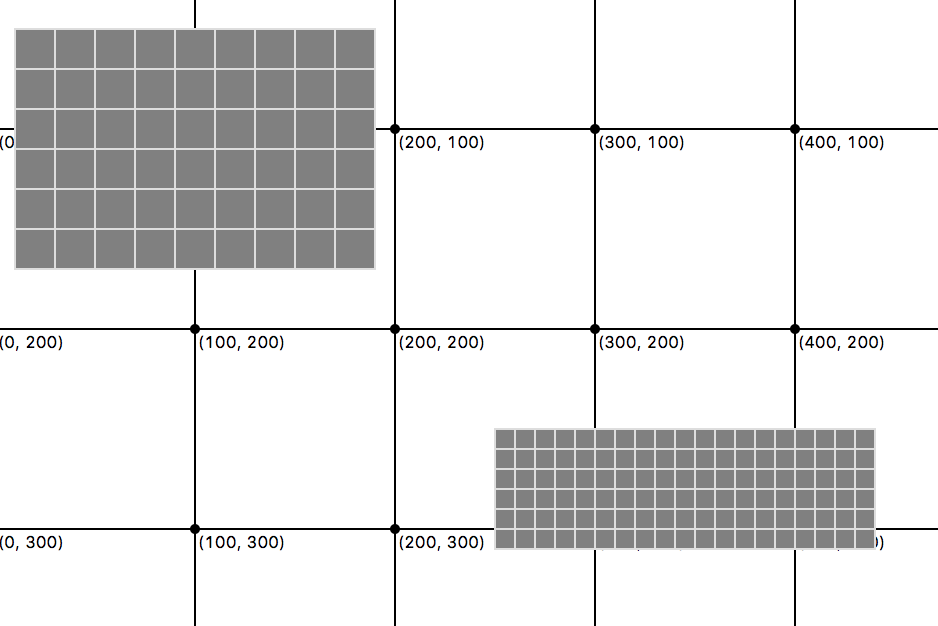
Open starter.py and take a look at it. Then run it using IDLE (or a code editor of your choice). You should see the first 6 rows of pixels for each
pixel art object (Frank and the heart). However, everything is being drawn
as a grey square. In other words, the color distinctions aren’t being honored (see image below).
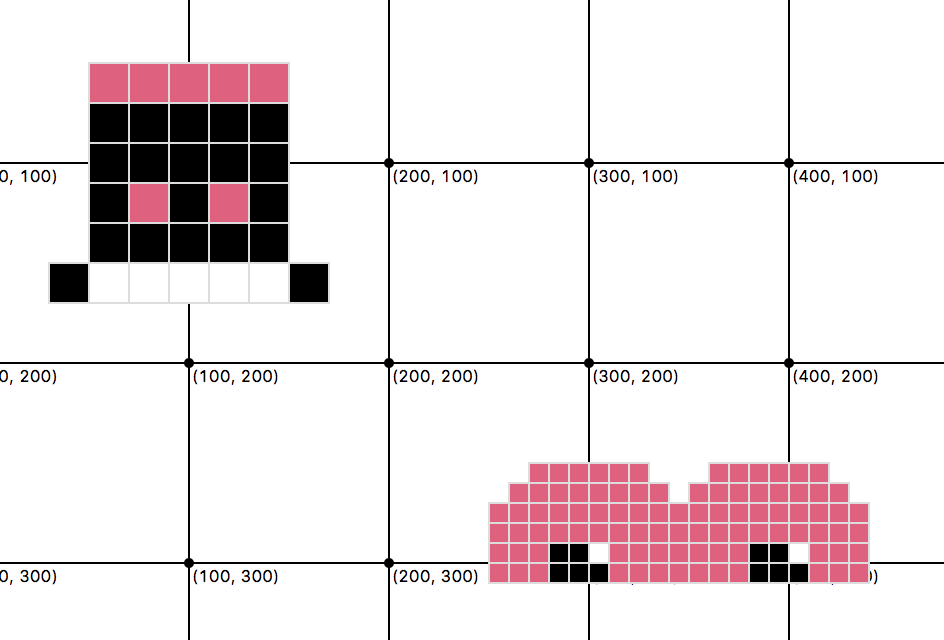
For your first task, you will modify the “draw_row” function – in any way you can think of – so that the function honors the color distinctions. Remember: a zero means that you shouldn’t draw anything in that cell, but the 1, 2, and 3 can be any color that you choose (see image below).
If you get stuck: After you’ve given it a shot, take a look at
hints/hint1a.pyandhints/hint1b.pyto consider a few approaches that you might have tried (but of course, there are others).
Step 2: Replace the repetitive draw_row function calls
Next, you will simplify the repetitive “draw_row” function calls (pictured below) with a “for loop.”
# first 6 rows of frank
draw_row(canvas, frank[0], (10, 50), pixel=20)
draw_row(canvas, frank[1], (10, 70), pixel=20)
draw_row(canvas, frank[2], (10, 90), pixel=20)
...

# first 6 rows of the heart
draw_row(canvas, heart[0], (250, 250), pixel=10)
draw_row(canvas, heart[1], (250, 260), pixel=10)
draw_row(canvas, heart[2], (250, 270), pixel=10)
...
You will use 2 “for loops” – one for frank and one for the heart. When you’re done, the entirety of Frank and the heart should be drawn (see image below).
If you get stuck: After you’ve given it a shot, take a look at
hints/hint2.pyto get a sense of how you might use a for loop to complete this task. Frank has been done for you. You try doing the heart.
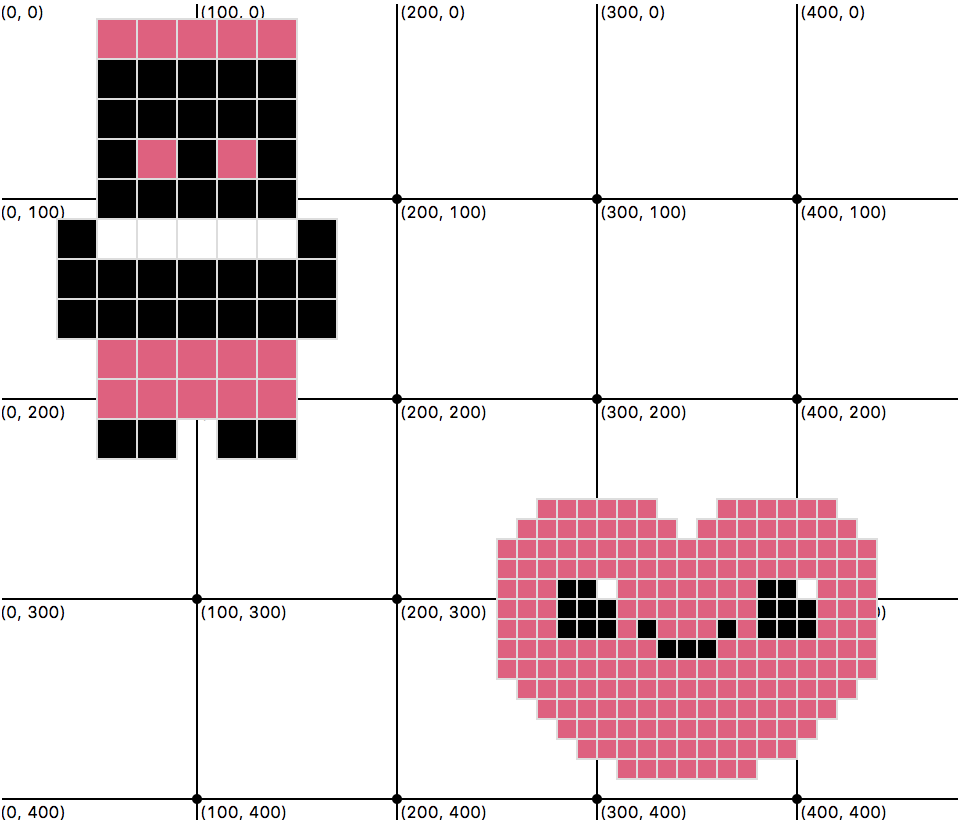
Step 3: Create a draw_pixel_art function
Now, create a draw_pixel_art function, with a function definition that looks like this:
def draw_pixel_art(canvas:Canvas, top_left:tuple, grid:tuple, pixel:int=10):
    # your function body here
    pass
If the function is invoked as follows…
draw_pixel_art(canvas, (0, 20), heart)
draw_pixel_art(canvas, (120, 220), frank, pixel=12)
draw_pixel_art(canvas, (420, 250), heart, pixel=8)
draw_pixel_art(canvas, (55, 415), heart, pixel=6)
draw_pixel_art(canvas, (350, 115), heart, pixel=5)
draw_pixel_art(canvas, (315, 380), frank, pixel=15)
draw_pixel_art(canvas, (420, 10), frank, pixel=10)
…it will generate the image pictured below.
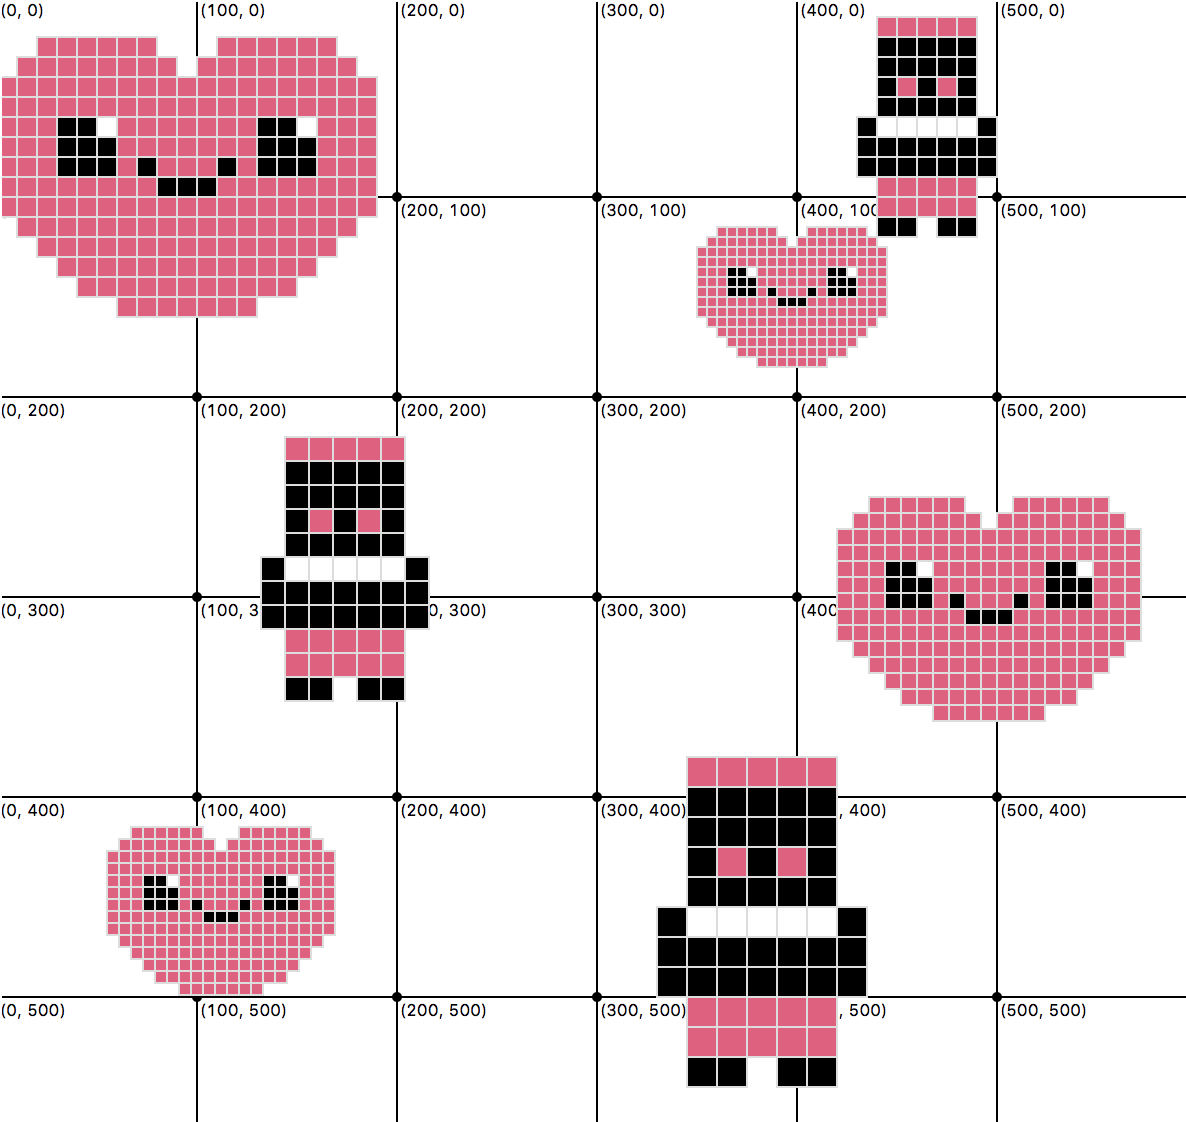
Note that the (x,y) position refers to the top-left corner of where the pixel art will be drawn.
If you get stuck: After you’ve given it a shot, take a look at
hints/hint3.pyto get a sense of how you might implement yourdraw_pixel_artfunction body.
Step 4: Enhancements
If you have time (or are turning this assignment in for credit in lieu of attendance), please complete the following enhancements:
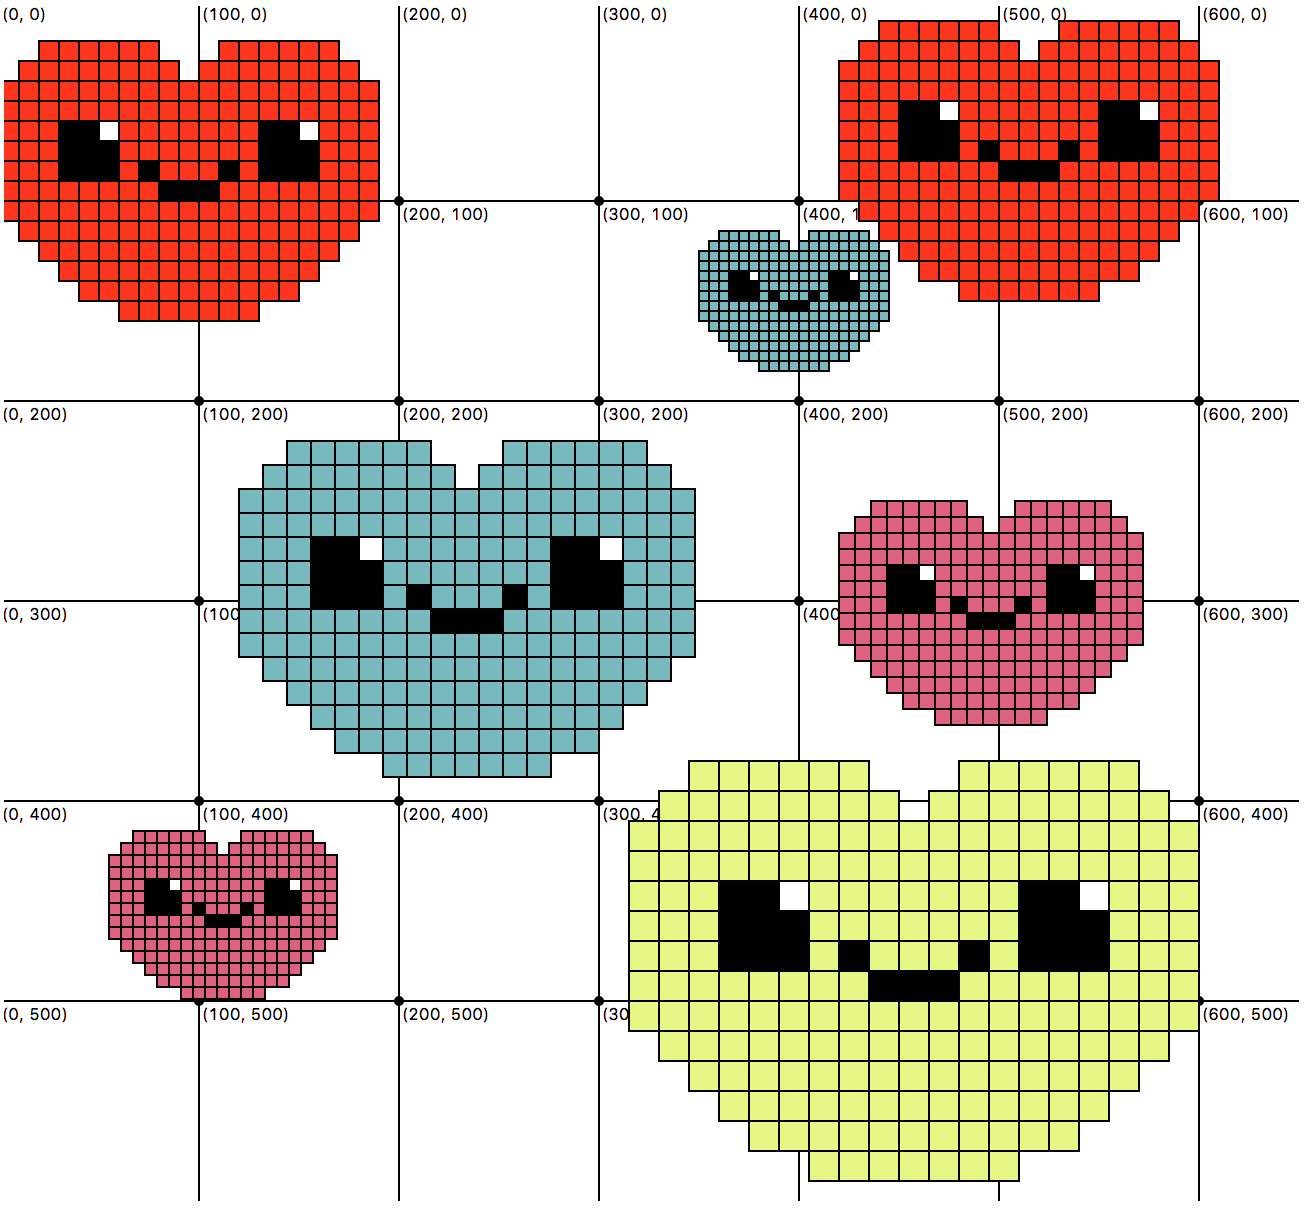
- Modify your function in a way that allows you to customize the color palette. In other words, the user should be able to choose which three colors to use for 1, 2, and 3 (see image below w/different hearts).
- Create a third “tuple of tuples” to represent a new pixel art drawing. To get ideas, Google “pixel art simple.”
What to turn in (same deal as always)
As described in the syllabus, there are two ways to earn full participation credit in each tutorial session:
- By attending them (synchronously), working through the exercises, and asking questions (as they arise).
- By turning in the tutorial exercise(s) ON CANVAS before the tutorial session. Tutorial exercises will be posted at the beginning of the week (at least 48 hours in advance).
Whichever option you choose, you will be expected to know the material reviewed in the tutorial for the exam, and are encouraged to fully complete and submit the tutorial assignments (though this is not required if you attended the tutorial).